
This second blog post (and talk) is primary scoped to container runtimes, where we will start with their historic origins before digging deeper into two dedicated projects: runc and CRI-O. We will initially build up a great foundation about how container runtimes work under the hood by starting with the lower level runtime runc. Afterwards, we will utilize the more advanced runtime CRI-O to run Kubernetes native workloads, but without even running Kubernetes at all.
Introduction
In the previous part of this series we discussed Linux Kernel Namespaces and everything around to build up a foundation about containers and their basic isolation techniques. Now we want to dive deeper into answering the question: “How to actually run containers?”. We will do so without being overwhelmed by the details of Kubernetes’ features or security related topics, which will be part of further blog posts and talks.
What is a Container Runtime?
Applications and their required or not required use cases are contentiously discussed topics in the UNIX world. The mainUNIX philosophy propagates minimalism and modular software parts which should fit well together in a complete system. Great examples which follow these philosophical aspects are features like the UNIX pipe or text editors like vim. These tools solve one dedicated task as best as they can and are tremendously successful at it. On the other side, there are projects like systemd or cmake, which do not follow the same approach and implement a richer feature set over time. In the end we have multiple views and opinions about answers to questions like ”How should an initialization system look like?” or ”What should a build system do?”. If these multi-opinionated views mix up with historical events, then answering a simple question might need more explanations than it should.
Now, welcome to the world of containers!
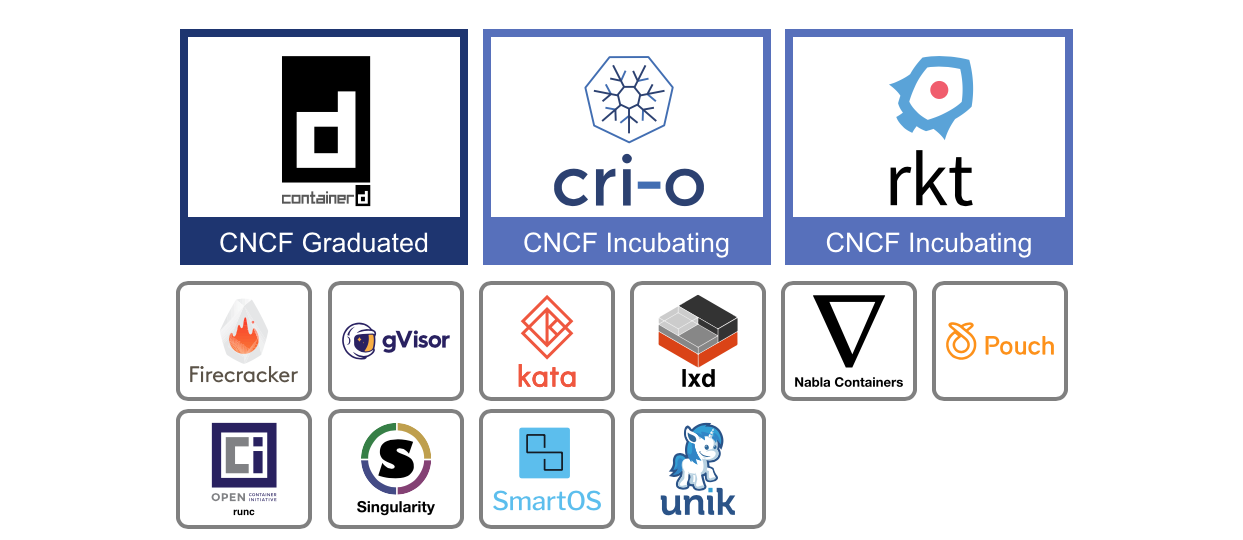
Lots of applications can run containers, whereas every application would have a sightly different opinion about what a container runtime should do and support. For example, systemd is able to run containers via systemd-nspawn, and NixOS has integrated container management as well. Not to mention all the other existing container runtimes like CRI-O, Kata Containers, Firecracker, gVisor, containerd, LXC, runc, Nabla Containers and many more. A lot of them are now part of theCloud Native Computing Foundation (CNCF) and their huge landscape, whereas someone might ask: ”Why do so many container runtimes exist?”.
Per usual for our series of blog posts, we should start from the historical beginning.
A Brief History
After the invention of cgroups back in 2008, a project called Linux Containers (LXC) started to pop-up in the wild, which should revolutionize the container world. LXC combined cgroup and namespace technologies to provide an isolated environment for running applications. You may know that we sometimes live in a parallel world. This means that Google started their own containerization project in 2007 called Let Me Contain That For You (LMCTFY), which works mainly at the same level as LXC does. With LMCTFY, Google tried to provide a stable and API driven configuration without users having to understand the details of cgroups and its internals.
If we now look back into 2013 we see that there was a tool written called Docker, which was built on top of the already existing LXC stack. One invention of Docker was that the user is now able to package containers into images to move them between machines. Docker were the fist ones who tried to make containers a standard software unit, as they state in their ”Standard Container Manifesto”.
Some years later they began to work on libcontainer, a Go native way to spawn and manage containers. LMCTFY was abandoned during that time too, whereas the core concepts and major benefits of LMCTFY were ported into libcontainer and Docker.
We are now back in 2015, where projects like Kubernetes hit version 1.0. A lot of stuff was ongoing during that time: The CNCF was founded as part of the Linux Foundation with the target to promote containers. The Open Container Initiative (OCI)was founded 2015 as well, as an open governance structure around the container ecosystem.
Their main target is to create open industry standards around container formats and runtimes. We were now in a state where containers are used, in terms of their popularity, side by side with classic Virtual Machines (VMs). There was a need for a specification of how containers should run, which resulted in the OCI Runtime Specification. Runtime developers should now be able to have a well-defined API to develop their container runtime. The libcontainer project was donated to the OCI during that time, whereas a new tool called runc was born as part of that. With runc it was now possible to directly interact with libcontainer, interpret the OCI Runtime Specification and run containers from it.
As of today, runc is one of the most popular projects in the container ecosystem and is used in a lot of other projects like containerd (used by Docker), CRI-O and podman. Other projects adopted the OCI Runtime Specification as well. For example Kata Containers makes it possible to build and run secure containers including lightweight virtual machines that feel and perform like containers, but provide stronger workload isolation using hardware virtualization technology as a second layer of defense.
Let’s dig more into the OCI Runtime Specification to get a better understanding about how a container runtime works under the hood.
Running Containers
runc
The OCI Runtime Specification provides information about the configuration, execution environment and overall life cycle of a container. A configuration is mainly a JSON file that contains all necessary information to enable the creation of a container on different target platforms like Linux, Windows or Virtual Machines (VMs).
An example specification can be easily generated with runc:
> runc spec
> cat config.json
{
  "ociVersion": "1.0.0",
  "process": {
    "terminal": true,
    "user": { "uid": 0, "gid": 0 },
    "args": ["sh"],
    "env": [
      "PATH=/usr/local/sbin:/usr/local/bin:/usr/sbin:/usr/bin:/sbin:/bin",
      "TERM=xterm"
    ],
    "cwd": "/",
    "capabilities": {
      "bounding": ["CAP_AUDIT_WRITE", "CAP_KILL", "CAP_NET_BIND_SERVICE"],
      [...]
    },
    "rlimits": [ { "type": "RLIMIT_NOFILE", "hard": 1024, "soft": 1024 } ],
    "noNewPrivileges": true
  },
  "root": { "path": "rootfs", "readonly": true },
  "hostname": "runc",
  "mounts": [
    {
      "destination": "/proc",
      "type": "proc",
      "source": "proc"
    },
    [...]
  ],
  "linux": {
    "resources": { "devices": [ { "allow": false, "access": "rwm" } ] },
    "namespaces": [
      { "type": "pid" },
      { "type": "network" },
      { "type": "ipc" },
      { "type": "uts" },
      { "type": "mount" }
    ],
    "maskedPaths": [
      "/proc/kcore",
      [...]
    ],
    "readonlyPaths": [
      "/proc/asound",
      [...]
    ]
  }
}
This file mainly contains all necessary information for runc to get started with running containers. For example, we have attributes about the running process, the defined environment variables, the user and group IDs, needed mount points and the Linux namespaces to be set up. One thing is still missing to get started running containers: We need an appropriate root file-system (rootfs). We already discovered in the past blog post how to obtain it from an already existing container image:
> skopeo copy docker://opensuse/tumbleweed:latest oci:tumbleweed:latest
[output removed]
> sudo umoci unpack --image tumbleweed:latest bundle
[output removed]
Interestingly, the unpacked container image already includes the Runtime Specification we need to run the bundle:
> sudo chown -R $(id -u) bundle
> cat bundle/config.json
{
  "ociVersion": "1.0.0",
  "process": {
    "terminal": true,
    "user": { "uid": 0, "gid": 0 },
    "args": ["/bin/bash"],
    "env": [
      "PATH=/usr/local/sbin:/usr/local/bin:/usr/sbin:/usr/bin:/sbin:/bin",
      "TERM=xterm",
      "HOME=/root"
    ],
    "cwd": "/",
    "capabilities": { [...] },
    "rlimits": [...]
  },
  "root": { "path": "rootfs" },
  "hostname": "mrsdalloway",
  "mounts": [...],
  "annotations": {
    "org.opencontainers.image.title": "openSUSE Tumbleweed Base Container",
    "org.opencontainers.image.url": "https://www.opensuse.org/",
    "org.opencontainers.image.vendor": "openSUSE Project",
    "org.opencontainers.image.version": "20190517.6.190",
    [...]
  },
  "linux": {
    "resources": { "devices": [ { "allow": false, "access": "rwm" } ] },
    "namespaces": [
      { "type": "pid" },
      { "type": "network" },
      { "type": "ipc" },
      { "type": "uts" },
      { "type": "mount" }
    ]
  }
}
There are now some annotations included beside the usual fields we already know from running runc spec. These can be used to add arbitrary metadata to the container, which can be utilized by higher level runtimes to add additional information to the specification.
Let’s create a new container from the bundle with runc. Before actually calling out to runc, we have to setup a receiver terminal to be able to interact with the container. For this, we can use the recvtty tool included in the runc repository:
> go get github.com/opencontainers/runc/contrib/cmd/recvtty
> recvtty tty.sock
In another terminal, we now call runc create with specifying the bundle and terminal socket:
> sudo runc create -b bundle --console-socket $(pwd)/tty.sock container
No further output, so what happened now? It seems like we have created a new container in created state:
> sudo runc list
ID          PID         STATUS      BUNDLE      CREATED                          OWNER
container   29772       created     /bundle     2019-05-21T08:35:51.382141418Z   root
The container seems to be not running, but what is running inside?
> sudo runc ps container
UID        PID  PPID  C STIME TTY          TIME CMD
root     29772     1  0 10:35 ?        00:00:00 runc init
The runc init command sets up a fresh environment with all necessary namespaces and launches a new initial process. The main process /bin/bash does not run yet inside the container, but we are still able to execute further processes within the container:
> sudo runc exec -t container echo "Hello, world!"
> Hello, world!
The created state of a container provides a nice environment to setup networking for example. To actually do something within the container, we have to bring it into the running state. This can be done via runc start:
> sudo runc start container
In the terminal where the recvtty process is running, a new bash shell session should now pop up:
mrsdalloway:/ $
mrsdalloway:/ $ ps aux
ps aux
USER       PID %CPU %MEM    VSZ   RSS TTY      STAT START   TIME COMMAND
root         1  0.0  0.0   5156  4504 pts/0    Ss   10:28   0:00 /bin/bash
root        29  0.0  0.0   6528  3372 pts/0    R+   10:32   0:00 ps aux
Nice, the container seems to be running. We can now utilize runc to inspect the container’s state:
> sudo runc list
ID          PID         STATUS      BUNDLE      CREATED                          OWNER
container   4985        running     /bundle     2019-05-20T12:14:14.232015447Z   root
> sudo runc ps container
UID        PID  PPID  C STIME TTY          TIME CMD
root      6521  6511  0 14:25 pts/0    00:00:00 /bin/bash
The runc init process has gone and now only the actual /bin/bash process exists within the container. We can also do some basic life cycle management with the container:
> sudo runc pause container
It should now be impossible to get any output from the running container in the recvtty session. To resume the container, simply call:
> sudo runc resume container
Everything we tried to type before should now pop up in the resumed container terminal. If we need more information about the container, like the CPU and memory usage, then we can retrieve them via the runc events API:
> sudo runc events container
{...}
The output is a bit hard to read, so let’s reformat it and strip some fields:
{
  "type": "stats",
  "id": "container",
  "data": {
    "cpu": {
      "usage": {
        "total": 31442016,
        "percpu": [ 5133429, 5848165, 827530, ... ],
        "kernel": 20000000,
        "user": 0
      },
      "throttling": {}
    },
    "memory": {
      "usage": {
        "limit": 9223372036854771712,
        "usage": 1875968,
        "max": 6500352,
        "failcnt": 0
      },
      "swap": { "limit": 0, "failcnt": 0 },
      "kernel": {
        "limit": 9223372036854771712,
        "usage": 311296,
        "max": 901120,
        "failcnt": 0
      },
      "kernelTCP": { "limit": 9223372036854771712, "failcnt": 0 },
      "raw": {
        "active_anon": 1564672,
        [...]
      }
    },
    "pids": { "current": 1 },
    "blkio": {},
    "hugetlb": { "1GB": { "failcnt": 0 }, "2MB": { "failcnt": 0 } },
    "intel_rdt": {}
  }
}
We can see that we are able to retrieve detailed runtime information about the container.
To stop the container, we simply exit the recvtty session. Afterwards the container can be removed with runc delete:
> sudo runc list
ID          PID         STATUS      BUNDLE      CREATED                         OWNER
container   0           stopped     /bundle     2019-05-21T10:28:32.765888075Z  root
> sudo runc delete container
> sudo runc list
ID          PID         STATUS      BUNDLE      CREATED     OWNER
Containers in the stopped state cannot run again, so they have to be recreated from a fresh state. As already mentioned, the extracted bundle contains the necessary config.json file beside the rootfs, which will be used by runc to setup the container. We could for example modify the initial run command of the container by executing:
> cd bundle
> jq '.process.args = ["echo", "Hello, world!"]' config.json | sponge config.json
> sudo runc run container
> Hello, world!
We have nearly every freedom by editing the rootfs or the config.json. So we could tear down the PID namespace isolation between the container and the host:
> jq '.process.args = ["ps", "a"] | del(.linux.namespaces[0])' config.json | sponge config.json
> sudo runc run container
16583 ?        S+     0:00 sudo runc run container
16584 ?        Sl+    0:00 runc run container
16594 pts/0    Rs+    0:00 ps a
[output truncated]
In the end runc is a pretty low level runtime, whereas improper configuration and usage can lead into serious security concerns. Truly, runc has native support for security enhancements like seccomp, Security-Enhanced Linux (SELinux) andAppArmor but these features should be used by higher level runtimes to ensure correct usage in production. It is also worth mentioning that it is possible to run containers in rootless mode via runc to security harden the deployment even further. We will cover these topics in future blog posts as well, but for now that should suffice on that level.
Another drawback in running containers only with runc would be that we have to manually set up the networking to the host to reach out to the internet or other containers. In order to do that we could use the Runtime Specification Hooks feature to set up a default bridge before actually starting the container.
But why don’t we leave this job to a higher level runtime as well? Let’s go for that and move on.
The Kubernetes Container Runtime Interface (CRI)
Back in 2016, the Kubernetes project announced the implementation of the Container Runtime Interface (CRI), which provides a standard API for container runtimes to work with Kubernetes. This interface enables users to exchange the runtime in a cluster with ease.
How does the API work? At the bottom line of every Kubernetes cluster runs a piece of software called the kubelet, which has the main job of keeping container workloads running and healthy. The kubelet connects to a gRPC server on startup and expects a predefined API there. For example, some service definitions of the API look like this:
// Runtime service defines the public APIs for remote container runtimes
service RuntimeService {
    rpc CreateContainer (...) returns (...) {}
    rpc ListContainers  (...) returns (...) {}
    rpc RemoveContainer (...) returns (...) {}
    rpc StartContainer  (...) returns (...) {}
    rpc StopContainer   (...) returns (...) {}
That seems to be pretty much what we already did with runc, managing the container life cycle. If we look further at the API, we see this:
    rpc ListPodSandbox  (...) returns (...) {}
    rpc RemovePodSandbox(...) returns (...) {}
    rpc RunPodSandbox   (...) returns (...) {}
    rpc StopPodSandbox  (...) returns (...) {}
}
What does “sandbox” mean? Containers should already be some kind of sandbox, right? Yes, but in the Kubernetes worldPods can consist of multiple containers, whereas this abstract hierarchy has to be mapped into a simple list of containers. Because of that, every creation of a Kubernetes Pod starts with the setup of a so called PodSandbox. Every container running inside the Pod is attached to this sandbox, so the containers inside can share common resources, like their network interfaces for example. runc alone does not provide such features out of the box, so we have to use a higher level runtime to achieve our goal.
CRI-O
CRI-O is a higher level container runtime which has been written on purpose to be used with the Kubernetes CRI. The name originates from the combination of the Container Runtime Interface and the Open Container Initiative. Isn’t that simple? CRI-O’s journey started as Kubernetes incubator project back in 2016 under the name Open Container Initiative Daemon (OCID). Version 1.0.0 has been released one year later in 2017 and follows the Kubernetes release cycles from that day on. This means for example, that the Kubernetes version 1.15 can be safely used together with CRI-O 1.15 and so on.
The implementation of CRI-O follows the main UNIX philosophy and tends to be a lightweight alternative to Docker or containerd when it comes to running production-ready workloads inside of Kubernetes. It is not meant to be a developers-facing tool which can be used from the command line. CRI-O has only one major task: Fulfilling the Kubernetes CRI. To achieve that, it utilizes runc for basic container management in the back, whereas the gRPC server provides the API in the front end. Everything in between is done either by CRI-O itself or by core libraries like containers/storage or containers/image. But in the end it doesn’t mean that we cannot play around with it, so let’s give it a try.
I prepared a container image called “crio-playground” to get started with CRI-O in an efficient manner. This image contains all necessary tools, example files and a working CRI-O instance running in the background. To start a privileged container running the crio-playground, simply execute:
> sudo podman run --privileged -h crio-playground -it saschagrunert/crio-playground
crio-playground:~ $
From now on we will use a tool called crictl to interface with CRI-O and its Container Runtime Interface implementation. crictl allows us to use YAML representations of the CRI API requests to send them to CRI-O. For example, we can create a new PodSandbox with the sandbox.yml lying around in the current working directory of the playground:
metadata:
  name: sandbox
  namespace: default
dns_config:
  servers:
    - 8.8.8.8
To create the sandbox in the running crio-playground container, we now execute:
crio-playground:~ $ crictl runp sandbox.yml
5f2b94f74b28c092021ad8eeae4903ada4b1ef306adf5eaa0e985672363d6336
Let’s store the identifier of the sandbox as $POD_ID environment variable for later usage as well:
crio-playground:~ $ export POD_ID=5f2b94f74b28c092021ad8eeae4903ada4b1ef306adf5eaa0e985672363d6336
If we now run crictl pods we can see that we finally have one PodSandbox up and running:
crio-playground:~ $ crictl pods
POD ID              CREATED             STATE               NAME                NAMESPACE           ATTEMPT
5f2b94f74b28c       43 seconds ago      Ready               sandbox             default             0
But what’s inside our sandbox? We surely can examine the sandbox further by using runc:
crio-playground:~ $ runc list
ID                                                                 PID         STATUS      BUNDLE                                                                                                             CREATED                          OWNER
5f2b94f74b28c092021ad8eeae4903ada4b1ef306adf5eaa0e985672363d6336   80          running     /run/containers/storage/vfs-containers/5f2b94f74b28c092021ad8eeae4903ada4b1ef306adf5eaa0e985672363d6336/userdata   2019-05-23T13:43:38.798531426Z   root
The sandbox seems to run in a dedicated bundle under /run/containers.
crio-playground:~ $ runc ps $POD_ID
UID        PID  PPID  C STIME TTY          TIME CMD
root        80    68  0 13:43 ?        00:00:00 /pause
Interestingly, there is only one process running inside the sandbox, called pause. As the source code of pause indicates, the main task of this process is to keep the environment running and react to incoming signals. Before we actually create our workload within that sandbox, we have to pre-pull the image we want to run. A trivial example would be to run a web server, so let’s retrieve a nginx image by calling:
crio-playground:~ $ crictl pull nginx:alpine
Image is up to date for docker.io/library/nginx@sha256:0fd68ec4b64b8dbb2bef1f1a5de9d47b658afd3635dc9c45bf0cbeac46e72101
Now let’s create a very simple container definition in YAML, like we did for the sandbox:
metadata:
  name: container
image:
  image: nginx:alpine
And now, let’s kick off the container. For that we have to provide the hash of the sandbox as well as the YAML definitions of the sandbox and container:
crio-playground:~ $ crictl create $POD_ID container.yml sandbox.yml
b205eb2c6abec3e7ade72e0cea09d827968a4c1089483cab06bdf0f4ee82ff0c
Seems to work! Let’s store the container identifier as $CONTAINER_ID for later reuse as well:
crio-playground:~ $ export CONTAINER_ID=b205eb2c6abec3e7ade72e0cea09d827968a4c1089483cab06bdf0f4ee82ff0c
What would you expect if we now check out the status of our two running containers while keeping the CRI API in mind? Correct, the container should be in the created state:
crio-playground:~ $ runc list
ID                                                                 PID         STATUS      BUNDLE                                                                                                             CREATED                          OWNER
5f2b94f74b28c092021ad8eeae4903ada4b1ef306adf5eaa0e985672363d6336   80          running     /run/containers/storage/vfs-containers/5f2b94f74b28c092021ad8eeae4903ada4b1ef306adf5eaa0e985672363d6336/userdata   2019-05-23T13:43:38.798531426Z   root
b205eb2c6abec3e7ade72e0cea09d827968a4c1089483cab06bdf0f4ee82ff0c   343         created     /run/containers/storage/vfs-containers/b205eb2c6abec3e7ade72e0cea09d827968a4c1089483cab06bdf0f4ee82ff0c/userdata   2019-05-23T14:08:53.701174406Z   root
And, like in our previous runc example, the container waits in runc init:
crio-playground:~ $ runc ps $CONTAINER_ID
UID        PID  PPID  C STIME TTY          TIME CMD
root       343   331  0 14:08 ?        00:00:00 /usr/sbin/runc init
crictl shows the container in created as well:
crio-playground:~ $ crictl ps -a
CONTAINER ID        IMAGE               CREATED             STATE               NAME                ATTEMPT             POD ID
b205eb2c6abec       nginx:alpine        13 minutes ago      Created             container           0                   5f2b94f74b28c
Now we have to start the workload to get it into the running state:
crio-playground:~ $ crictl start $CONTAINER_ID
b205eb2c6abec3e7ade72e0cea09d827968a4c1089483cab06bdf0f4ee82ff0c
This should be successful, too. Let’s verify if all processes are running correctly:
crio-playground:~ $ crictl ps
CONTAINER ID        IMAGE               CREATED             STATE               NAME                ATTEMPT             POD ID
b205eb2c6abec       nginx:alpine        15 minutes ago      Running             container           0                   5f2b94f74b28c
Inside the container should now run an nginx web server:
crio-playground:~ $ runc ps $CONTAINER_ID
UID        PID  PPID  C STIME TTY          TIME CMD
root       343   331  0 14:08 ?        00:00:00 nginx: master process nginx -g daemon off;
100        466   343  0 14:24 ?        00:00:00 nginx: worker process
But how to reach the web servers content now? We did not expose any ports or other advanced configuration for the container, so it should be fairly isolated from the host. The solution lies down in the container networking. Because we use a bridged network configuration in the crio-playground, we can simply access the containers network address. To get these we can exec into the container and list the network interfaces:
crio-playground:~ $ crictl exec $CONTAINER_ID ip addr
1: lo: <LOOPBACK,UP,LOWER_UP> mtu 65536 qdisc noqueue state UNKNOWN qlen 1000
    link/loopback 00:00:00:00:00:00 brd 00:00:00:00:00:00
    inet 127.0.0.1/8 scope host lo
       valid_lft forever preferred_lft forever
    inet6 ::1/128 scope host
       valid_lft forever preferred_lft forever
3: eth0: <BROADCAST,MULTICAST,UP,LOWER_UP> mtu 1500 qdisc noqueue state UP
    link/ether 16:04:8c:44:00:59 brd ff:ff:ff:ff:ff:ff
    inet 172.0.0.2/16 scope global eth0
       valid_lft forever preferred_lft forever
    inet6 fe80::1404:8cff:fe44:59/64 scope link
       valid_lft forever preferred_lft forever
And now just query the inet address for eth0:
crio-playground:~ $ curl 172.0.0.2
<!DOCTYPE html>
<html>
<head>
<title>Welcome to nginx!</title>
[output truncated]
Hooray, it works! We successfully run a Kubernetes workload without running Kubernetes!
The overall Kubernetes story about Network Plugins or the Container Network Interface (CNI) is worth another blog post, but that’s a different story and we stop right here with all the magic.
Conclusion
And that’s a wrap for this part of the blog series about the demystification of containers. We discovered the brief history of container runtimes and had the chance to run containers with the low level runtime runc as well as the higher level runtime CRI-O. I can really recommend to have a closer look at the OCI runtime specification and test different configurations within the crio-playground environment. For sure we will see CRI-O in the future again when we talk about container-related topics like security or networking. Besides that, we will have the chance to explore different tools like podman, buildah or skopeo, which provide more advanced container management solutions. I really hope you enjoyed the read and will continue following my journey into future parts of this series. Feel free to drop me a line anywhere you can find me on the internet. Stay tuned!
You can find all necessary resources about this series on GitHub.